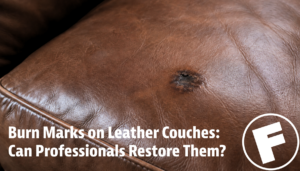
Burn Marks on Leather Couches: Can Professionals Restore Them Seamlessly?
Accidents happen in every living room. A fallen ember from a fireplace, an unattended candle, an accidental slip with a curling iron, or rogue ash from a cigarette can instantly turn a pristine sofa into a source of frustration. Similarly, pet claws, sharp belt buckles, or accidental punctures can cause unsightly rips. A dark, melted burn spot or a jagged rip on high-quality furniture stands out immediately, drawing the eye and making an expensive seating piece look worn out.
When homeowners face these issues, their immediate reaction is often a mix of panic and uncertainty. Is the cushion ruined forever? Will you have to re-upholster the entire piece or buy a brand-new sectional? Or can a specialized leather couch burn fix service or a dedicated leather tear repair service actually erase the issue and restore the surface to its original texture and color?
The short answer is yes. Trained leather restoration experts can fix surface defects seamlessly, preserving your furniture without requiring complete replacement. However, achieving an invisible finish depends heavily on the type of material, the depth of the thermal compromise, and the specific restoration techniques applied.
This guide walks you through everything you need to know about professional leather burn repair, comparing expert restoration methods against DIY kits, explaining costs, and outlining step-by-step how professionals handle everything from minor singes to deep structural damage.
Understanding Leather Heat Damage: What Happens Behind the Burn?
To understand how repair technicians restore damaged furniture, it helps to know what happens to animal hide when exposed to extreme heat. Leather is an organic material made of tightly interwoven collagen fibers. During the tanning and finishing process, manufacturers apply oils, moisture, and protective coatings to give the material its flexible, soft texture and rich appearance.
When intense heat contacts the surface, it triggers a rapid chemical and physical reaction:
- Moisture Evaporation and Shrinkage: High temperatures instantly strip moisture from the affected zone. The collagen fibers dry out, shrink, and tighten up, creating a hardened, puckered ring around the damaged area.
- Topcoat Combustion: Pigmented and finished hides feature a thin clear coat and color layer on top. Heat melts or burns through this finish, exposing the raw grain or sub-layer beneath.
- Charring and Fiber Breakdown: In severe cases, such as a burning cigarette left sitting on a cushion, heat burns straight through the topcoat into the core hide. The fibers carbonize, turning black, brittle, and flaky.
- Substructure Damage: If the heat penetrates deep enough, it can singe the underlying foam padding or fibrous backing mesh, leaving a depression or hole in the cushion core.
Because heat alters both the texture and structure of the hide, simply dabbing paint or color over a burn mark will not solve the problem. Effective upholstery burn repair requires rebuilding the compromised area from the bottom up before matching color and grain patterns.
The Spectrum of Furniture Damage Severity
Not all damage on a heat damage leather sofa or ripped cushion is created equal. Repair specialists evaluate issues based on three distinct levels of severity:
1. Surface Singes, Scratches, and Discoloration (Minor)
- Common Causes: Brief contact with a hot mug, a hot hair tool, or light pet claw marks.
- Characteristics: The surface looks darkened, slightly discolored, or scraped. The top clear coat may be scorched or abraded, but the fibers beneath remain intact and flexible.
- Repair Difficulty: Low. Technicians can usually sand back the scorched or scuffed finish, recondition the hide, and apply a fresh, color-matched pigment topcoat.
2. Shallow Melting, Charring, and Clean Rips (Moderate)
- Common Causes: Cigarette burn leather couch repair scenarios where a lit cigarette rested on the armrest, or sharp objects creating clean cuts.
- Characteristics: A defined crater-like mark with charred edges or a clean split across the hide. The damage penetrates through the topcoat and into the upper fiber layer.
- Repair Difficulty: Moderate. The technician must carefully trim away hardened char or secure torn leather couch repair edges, fill the void with flexible sub-patching material, recreate the grain, and re-pigment the spot.
3. Deep Hole Penetration and Structural Tears (Severe)
- Common Causes: Dropped burning coals, prolonged contact with open flames, or heavy stress on aged seams resulting in a ripped leather sofa repair requirement.
- Characteristics: The damage goes completely through the hide, exposing or melting internal foam or structural batting.
- Repair Difficulty: High. Requires structural reinforcement, foam patching, internal backing support, sub-surface filling, grain replication, and detailed color blending.
Why DIY Repair Kits Frequently Fail
When faced with an unsightly mark or rip, many homeowners search online and purchase off-the-shelf liquid patch kits. While these packages promise quick, cheap fixes for damaged couch repair, they rarely deliver satisfactory results.
Here is why DIY attempts often make structural issues look worse:
- Inability to Replicate Complex Grains: Standard store kits include basic grain paper that you press into hot liquid vinyl. Real hides feature natural, irregular pores and grain structures that synthetic stamped paper cannot mimic.
- Rigid Fillers That Crack Over Time: Low-cost retail fillers dry into stiff plastic compounds. Seating flexible surfaces flex constantly when people sit down. Stiff DIY compounds crack, lift, or peel away from the surrounding material within weeks.
- Poor Color Matching: Matching a couch finish requires understanding color theory, undertones, and light reflection. DIY kits supply four or five primary color tubs to mix by hand. Matching aged, sun-faded furniture with basic primary paints is nearly impossible for untrained eyes.
- Failure to Remove Carbonized Char: Applying filler over charred, brittle material creates a weak foundation. Unless all scorched fibers are properly prepped and removed, the patch will dislodge quickly.
Professional technicians do not use off-the-shelf retail kits. Instead, they utilize commercial grade compounds, custom mixed liquid dyes, structural backing cloths, and specialized graining tools designed specifically for residential furniture, plastic, and vinyl restoration.
The Professional Repair Process Step-by-Step
When you hire a specialist for leather couch damage repair, they follow a systematic restoration protocol. This process restores structural integrity, blends the texture, and matches the color so the repair blends seamlessly into the surrounding furniture.
- Inspection and Material Identification: Before touching any tool to your furniture, the technician identifies the exact type of finish. Pigmented leather responds differently than top-grain aniline or pull-up hides. Knowing the finish type guides which cleaning agents, fillers, and bonding compounds will bond safely to an upholstery leather repair couch project.
- Char Removal and Area Stabilization: A repair is only as strong as its foundation. Using precision scalpel tools, the professional carefully trims away hardened, carbonized char from the edges of the burn or smooths jagged edges along a tear. They also smooth down any raised, puckered rings caused by heat shrinkage. If charred material is left behind, new bonding compounds will fail to stick properly.
- Sub-Surface Reinforcement: For deep burns or cuts that go through the hide, technicians insert a thin, high-strength fabric backing patch underneath the material. This sub-patch is maneuvered into place using tweezers and secured to the underside with flexible adhesive. This creates a bridge across the gap, preventing the filler from sinking into internal cushion foam.
- Layered Flexible Micro-Filling: Next, the specialist fills the depression using specialized liquid compounds. Rather than filling the crater all at once, they apply thin micro-layers. Each layer is cured using controlled heat tools or air drying. These compounds remain soft and flexible once cured, allowing the patch to stretch and compress naturally when someone sits down.
- Grain Texture Impression and Replication: Once the filler reaches the exact height of the surrounding hide, the technician replicates the natural texture. They do this by taking an impression of the original grain using a quick-setting mold or by manually applying graining pads while the top compound layer is thermally cured. Matching the pore structure prevents the repair from looking like a flat, smooth plastic spot.
- Precision Color Matching and Airbrush Application: Color blending is where true craftsmanship comes into play. The technician custom mixes pigments on-site, adjusting for age, patina, and light exposure. Using fine airbrush equipment, they apply microscopic coats of color over the filled area, feathering the edges outwards into surrounding panels. This gradual feathering eliminates hard borders, making the repair virtually undetectable under normal lighting.
How Different Finishes Handle Professional Repair
The ultimate visibility of a restoration project depends heavily on the manufacturing style of your furniture. Here is how common finishes respond to specialized services:
- Pigmented / Protected Leather: This is the most popular choice for family room furniture. It features a solid dye coating protected by a clear top coat. Because pigment coats are opaque, professionals can fill, grain, and spray pigments with nearly flawless results. In almost all cases, a burn or tear fix on protected hides is virtually impossible to detect.
- Semi-Aniline Leather: Semi-aniline pieces offer a soft feel while retaining a thin layer of protective pigment. Restoration experts use lighter, semi-transparent dyes to blend repaired spots without masking the natural depth and variation of the surrounding hide.
- Full Aniline Leather: Full aniline furniture is dyed in a vat without surface pigments or synthetic protective layers. Heat creates distinct dark marks because the raw fibers absorb energy quickly. While technicians can structurally repair holes or tears in aniline material, matching exact absorbency and natural patina requires advanced tinting techniques. The fix will look solid, but under close inspection, subtle shade variations may remain as part of the natural aging process.
Repair vs. Re-Upholstery vs. Replacement: A Cost Breakdown
When evaluating options for restoring damaged living room furniture, homeowners must balance financial investment against expected quality. Replacing an entire sofa or re-upholstering individual panels can be costly and inconvenient.
- Professional Spot Repair: Typically ranges from $150 to $400 per area. The work is completed on-site in 1 to 3 hours, offering an eco-friendly solution with seamless aesthetic results.
- Panel Re-Upholstery: Often costs between $600 and $1,200. This process takes 2 to 4 weeks and involves material waste, with the potential risk that new hide panels may not match sun-faded adjacent sections.
- Full Furniture Replacement: Costs anywhere from $2,000 to over $6,000. It requires days or weeks of shopping and results in old furniture ending up in landfills.
Choosing on-site restoration saves significant time and money. Rather than waiting weeks for an upholstery shop to source matching material, mobile technicians visit your home and complete the work in a single afternoon. Additionally, repairing existing furniture keeps solid, well-built frames out of landfills, making it an environmentally responsible choice.
What to Do Immediately After Damage Occurs
If an accident damages your furniture, taking the right immediate steps can minimize the extent of the issue and make ultimate restoration easier for a professional.
DO:
- Remove Heat Sources or Stress Points Safely: Immediately lift burning embers, hot irons, or sharp items away from the seating surface.
- Allow Hot Spots to Cool Naturally: Let heated surfaces drop to room temperature on their own.
- Gently Wipe Away Loose Ash: Use a dry, soft microfiber cloth to wipe away loose debris or ash.
- Take Clear Photos: Photograph the affected area in good lighting. These photos help technicians provide accurate remote estimates.
DO NOT:
- Do Not Apply Water or Ice Directly: Cold water or ice placed directly on hot surfaces can cause thermal shock, worsening hide shrinkage and warping.
- Do Not Scrub with Harsh Chemicals: Avoid rubbing alcohol, nail polish remover, dish soap, or household bleach. These chemicals dissolve healthy surrounding finishes and worsen discoloration.
- Do Not Pull at Charred or Torn Edges: Peeling or pulling at compromised edges can tear surrounding healthy hide, expanding the size of the hole or rip.
- Do Not Apply Shoe Polish or Household Glue: Do not try to cover damage with shoe polish or seal holes with superglue. These items chemically contaminate the material, making future professional compound adhesion much harder.
Maintaining Repaired Furniture
Once a professional completes your service, caring for the restored area properly will ensure the fix lasts for years. Modern compounds are designed to match the longevity of natural hide, but basic care is necessary.
- Allow Full Cure Time: Avoid sitting on or placing objects on the repaired area for at least 24 to 48 hours after service, allowing pigments and clear coats to bond completely.
- Use pH-Neutral Cleaners: Clean your sofa regularly using specialized cleaners that do not contain harsh solvents or abrasive scrubbers.
- Condition Regularly: Apply quality leather conditioner every 6 to 12 months. Keeping surrounding areas soft and supple reduces stress along repaired seams.
- Keep Heat Sources at a Distance: Position couches at least two feet away from space heaters, radiators, and open fireplaces. Avoid placing hot mugs directly on armrests without protective coasters.
If an accidental burn, tear, or scorch mark has damaged your sofa, you do not have to live with the eyesore or spend thousands replacing your furniture. Certified mobile restoration specialists bring specialized equipment, commercial grade materials, and fine-art color matching straight to your home to erase damage completely and restore your couch to its original beauty.
Ready to bring your leather furniture back to life? Connect with certified local restoration experts today to request a free damage evaluation and personalized repair quote.
Frequently Asked Questions
Q: Can cigarette burns on leather couches be completely invisible after repair?
A: Yes, in most cases involving pigmented or semi-aniline finishes, professional technicians can make cigarette burn repairs virtually invisible. By removing charred fibers, applying flexible fillers, recreating natural grain patterns, and custom-mixing color pigments, the restored spot blends seamlessly into the surrounding material under standard home lighting.
Q: How long does a professional repair service take to complete?
A: Most individual burn or tear repairs are completed on-site within one to two hours. The process includes prepping the area, layering and heat-curing flexible compounds, and airbrushing color coats. The repaired surface is typically ready for normal use within 24 to 48 hours after the service is finished.
Q: Is it cheaper to repair a damaged leather sofa panel or replace it?
A: Repairing a damaged mark or rip is significantly cheaper than replacing a panel or buying a new sofa. On-site professional spot repairs usually cost between $150 and $400, whereas re-upholstering a single cushion panel often ranges from $600 to $1,200 and requires waiting weeks for matching material delivery.
Q: Will the repaired area peel or crack when people sit on the couch?
A: High-quality professional repair compounds are specifically formulated to expand, compress, and flex naturally alongside genuine furniture hides. Unlike rigid DIY glue kits, commercial compounds bond chemically to surrounding fibers, ensuring the patch will not peel, crack, or lift under normal daily sitting use.