Homebuilder Secrets: Passing Final Inspection with Flawless Vinyl Color Matching
How Builders Pass Final Siding Inspections Fast
Passing a new construction final inspection with damaged vinyl siding requires specialized surface restoration rather than full panel replacement. Field technicians use structural resin fillers, custom-pigmented coatings matched on-site, and grain replication tools to eliminate scratches, nail holes, ladder gouges, and heat distortion. By restoring damaged exterior vinyl on-site, builders eliminate batch color mismatches, save thousands in tear-off labor, avoid supply chain delays, and pass closing walkthroughs on schedule.
The Walkthrough Dilemma: Small Vinyl Damage, Massive Project Delays
Every site superintendent and project manager knows the anxiety of the final pre-closing walkthrough. The interior finish looks pristine, the hardwoods shine, and the HVAC passes testing with flying colors. Then, during the exterior perimeter sweep, the buyer or local building inspector stops, points, and writes a red mark on the punch list.
A stray trade worker dragged an extension ladder across the main elevation, leaving a three-foot white gouge on dark gray double-four vinyl siding. A rogue spark from an angle grinder pitted a white vinyl window casing. A masonry crew bumped a scaffolding rail against a corner post, leaving a crushed profile and deep surface abrasions.
At this late stage in the build schedule, damage to exterior vinyl siding, J-channels, corner posts, and window frames poses a major financial hazard. Replacing an entire vinyl siding course or window casing unit is rarely as simple as swapping a board. It often involves:
- Unzipping multiple courses of surrounding siding from the starter strip up to the damaged area.
- Risking secondary damage to house wrap, flashing tape, or surrounding panel locking tabs during tear-off.
- Experiencing supply chain wait times of three to six weeks for discontinued or out-of-stock color lots.
- Dealing with obvious batch shade variations caused by sun exposure, factory dye lot differences, or manufacturing line shifts.
When closing deadlines hang in the balance, homebuilders need a reliable new construction vinyl fix that satisfies the eagle eyes of home inspectors and picky buyers without delaying occupancy permits or inflating trade budgets.
Why Traditional Panel Replacement Fails at Final Walkthrough
For decades, the standard response to damaged exterior vinyl was straightforward: order a replacement panel from the supplier, send a siding crew back to the jobsite, and tear down the damaged wall section. However, modern building materials and tight construction timelines have rendered full replacement impractical in most warranty and inspection scenarios.
| Inspection Challenge | Full Panel Replacement | Specialized On-Site Restoration |
| Color Alignment | High risk of mismatch due to lot shifts | Formulated directly on-site |
| Time to Completion | 1 to 4 weeks (ordering + labor) | 1 to 2 hours per area |
| Material Expense | High (tears down intact courses) | Minimal material waste |
| Weather Barrier Risk | Medium to High (disrupts wrap) | Zero disruption to underlying wrap |
| Inspection Pass Rate | Moderate (visible seams/color steps) | High (flawless texture and tone) |
The Problem of Dye Lot Mismatches
Vinyl siding manufacturing relies on chemical dye lots and UV-stabilized capstock layers. Even if you order the exact manufacturer code and color name, a panel produced in a different batch six months later will rarely match the ones installed on the house.
Furthermore, once installed, exterior vinyl begins reacting to ambient sunlight, heat, and moisture within weeks. When you drop a factory-fresh replacement panel into the center of a sun-exposed wall, the result is a visible patch effect that sticks out instantly during an inspection. Achieving a seamless siding color match requires blending pigments on-site to match the current condition of the installed panels.
The Ripple Effect of Structural Teardown
Vinyl siding relies on an interlocking lock-and-nail hem system. To remove a damaged panel situated ten feet above ground level, workers must unzip every panel above it or force a zip tool behind tight joints. During cold weather or high-heat conditions, vinyl becomes either brittle or overly flexible. Attempting to tear off a single board frequently causes cracked nailing hems, snapped lock channels, or torn house wrap layers on adjacent panels, turning a minor two-inch scratch into a multi-panel siding overhaul.
Common Vinyl Siding and Window Trim Defects Found on Construction Sites
Understanding how damage occurs during the building process helps site managers identify defects early and choose the correct restoration technique before the inspector arrives.
1. Ladder and Scaffolding Abrasion Scratches
Trade crossover is the leading cause of exterior vinyl damage. Painters, roofers, gutter installers, and insulation crews constantly move extension ladders and staging across exterior walls. Soft capstock layers on vinyl panels scrape easily, exposing the lighter raw PVC core underneath. Knowing how to hide siding scratches effectively requires more than brushing matching paint over the mark; the gouge depth must be filled to recreate a level surface profile.
2. Window Frame and Trim Casing Scrapes
Vinyl window frames and exterior casing trims are subjected to heavy abuse during masonry, brick-washing, and exterior plastering phases. Acid washes can etch the vinyl finish, while metal trowels and falling debris leave deep gouges along the window sill and picture-frame moldings. Because replacing a vinyl window casing often requires breaking interior drywall or breaking exterior flashing seals, targeted vinyl window frame repair is the preferred path for builders.
3. Heat Warping and Surface Pitting
Reflective low-E glass from neighboring structures, nearby burn barrels, or close-range angle grinder sparks can melt or pit vinyl siding panels. Heat-distorted vinyl exhibits shiny, warped patches or micro-pitting that catches the sunlight at sharp angles. Specialized restoration restores both the mechanical profile and the low-gloss finish needed to pass inspection under direct sunlight.
4. Incorrect Fastening and Misaligned Nail Holes
Exterior light fixtures, hose bibbs, shutter mounts, and satellite brackets are sometimes installed in the wrong location during rough-in phases. When sub-contractors relocate these items, open screw and nail holes remain in the exterior cladding. Unfilled holes violate weather barrier standards and instantly trigger inspection rejections.
Secrets to Invisible Vinyl Color Matching and Surface Repair
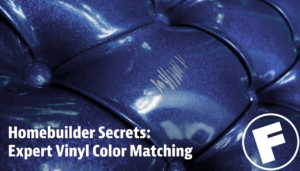
Passing a tough punch list review requires mastering the art and science of surface restoration. Professional specialists follow a precise methodology to ensure that repairs remain invisible from any angle, under any lighting conditions.
Formulating Custom Pigments on Site
Off-the-shelf latex spray paint or standard exterior touch-up pens do not bond permanently to vinyl. Raw PVC expands and contracts significantly with ambient temperature changes. Standard paints crack, peel, or chalk within months, leading to costly warranty claims after the buyer moves in.
Professional restoration relies on proprietary, flexible resin coatings mixed on-site. Technicians analyze the target wall under natural daylight, blending exact pigment concentrates that account for:
- Factory base color codes.
- Environmental fading and oxidation.
- Ambient sheen levels (flat, satin, low-gloss, or semi-gloss).
By tailoring the pigment mixture directly on the jobsite, technicians achieve an accurate match that flexes with seasonal thermal expansion.
Structural Resin Bonding for Deep Gouges
To repair deep gouges permanently, the process must restore structural integrity to the PVC wall. Simply coating over a gouge leaves a visible shadow line when sunlight hits the wall at an angle.
Restoration specialists use thermo-setting vinyl resins and specialized compound fillers. These materials bond at a molecular level with the surrounding PVC panel, filling deep cracks and gouges completely. Once cured, the compound is micro-sanded flat, recreating the original smooth plane of the siding profile without leaving ridge lines.
Replicating Natural Grain Patterns
Vinyl siding and exterior window trims feature wood-grain textures, such as cedar mill finishes or low-profile brush strokes. A flat, smooth patch on a wood-grained panel stands out immediately during an inspection walkthrough.
To overcome this, technicians use grain-replication tools or hand-embossing techniques while the filler compound cures. By pressing matching texture patterns into the wet resin before applying the final topcoat, the repair mimics the natural light reflection of surrounding panels.
Restoring Exterior Window Casings and Trim Details
Window sills and exterior casing trim profiles receive intense close-up inspection during buyer walkthroughs. Because these features sit at eye level near entryways and patios, flaws are easy to spot.
- Surface Preparation: Clean away dirt, chalk, and masonry wash residues from the affected area.
- Structural Bonding: Inject micro-resin filler directly into gouges, chips, or cracks.
- Sheen Alignment: Sand flush to re-establish crisp edge lines and profiles.
- Color Application: Apply a flexible, color-matched UV-resistant protective finish.
- Inspection Verification: Review the finish under direct natural lighting to confirm a uniform look.
When addressing window casing damage, technicians fix deep scuffs, rebuild crushed profile edges, and re-establish original sharp detail lines. The final step involves applying a durable, weather-tested protective coating that resists chalking and UV degradation.
Rapid Mobile Field Execution
In the high-speed environment of commercial and residential homebuilding, waiting weeks for sub-contractors to return can ruin closing dates and draw interest penalties on construction loans.
Mobile repair units allow technicians to enter the jobsite, complete surface repairs across siding, window casings, soffits, and door frames in a single morning, and clear the punch list before the inspector arrives in the afternoon.
Practical Checklist: Preparing Your Build Site for Siding Inspection
To streamline your final exterior walkthrough, use this field-tested checklist two to three days before your official building inspection or buyer walkthrough.
Exterior Wall & Trim Audit
- [ ] Walk the Perimeter at Solar Noon: Inspect exterior walls when sunlight hits panels directly to reveal surface scratches, heat warping, and uneven gloss levels.
- [ ] Check Low-Level Zones: Inspect the bottom two siding courses around hose bibbs, AC line sets, and outdoor outlets for ladder scuffs and tool scrapes.
- [ ] Examine Window Sill Corners: Inspect the lower corners of all main-level vinyl window casings for acid etching, plaster splatters, or utility knife gouges.
- [ ] Verify Hole Closures: Ensure all misdrilled holes from shutter removals or temporary utility lines are sealed flush and color-matched.
- [ ] Clean Off Environmental Chalk: Wash away red clay dust, mortar dust, and chalk lines with mild soapy water before assessing true color tone.
- [ ] Confirm Trim Line Continuity: Inspect vertical corner posts and J-channel seams to ensure edges are straight, sharp, and gouge-free.
Reducing Post-Occupancy Builder Warranty Claims
Passing the final municipal inspection is only half the battle. The second critical threshold is surviving the first 12 months of homeowner occupancy. Standard paint touch-ups applied by quick-fix crews often peel, flake, or discolor after exposure to winter freezes and summer heat spikes, triggering frustrating warranty callbacks.
| Traditional Touch-Up Paint | Specialized Vinyl Restoration |
| Peels in 6 to 12 months | Molecular resin bond |
| Chalks under UV exposure | Integrated UV inhibitors |
| Fades unevenly | Flexes with panel movement |
| Triggers warranty calls | Permanent factory-style finish |
By investing in specialized builder warranty trim repair methods that utilize UV-stabilized, flexible vinyl compounds, homebuilders protect their reputation and eliminate repetitive service calls. Proper restoration bonds chemically with the base PVC, ensuring the repair ages at the exact same rate as the surrounding siding wall.
Comparing Costs: Restoration vs. Replacement
Site managers must carefully balance trade budgets against turnaround times. Below is a practical cost and time breakdown comparing traditional vinyl siding replacement against professional on-site vinyl siding restoration for typical construction damage scenarios.
| Cost Factor | Full Panel / Frame Replacement | Professional On-Site Restoration |
| Average Material Cost | $150 – $600 (purchase cost) | Included in service call |
| Labor & Teardown Hours | 4 – 10 hours (multi-trade) | 1 – 2 hours (single technician visit) |
| Schedule Delay Risk | 5 – 20 business days (lead time) | Same-day completion |
| Secondary Damage Potential | High (house wrap, flashing) | None |
| Average Total Cost Per Area | $450 – $1,200 | $150 – $350 |
As highlighted by the comparison, opting for targeted surface restoration saves up to 70% in direct costs while eliminating schedule risk entirely.
Partnering with Professional Surface Repair Specialists
When closing dates are approaching and your exterior punch list requires flawless results, working with experienced surface restoration specialists can help ensure your project is completed to the highest standards. Professional technicians use advanced color-matching techniques, specialized repair compounds, and surface texturing expertise to restore damaged vinyl siding, window casings, and exterior trim without unnecessary replacements or costly delays.
Instead of removing and replacing entire sections, expert restoration provides an efficient solution for addressing cosmetic damage caused during construction. From minor scratches and scuffs to more noticeable surface imperfections, skilled technicians can help restore the exterior’s appearance and maintain the quality your buyers expect.
Contact our team today to learn how professional surface repair services can help you complete your project, improve curb appeal, and deliver a finished home that meets your standards.
Frequently Asked Questions
Q: Can dark-colored vinyl siding be repaired and color-matched accurately without replacing the entire panel?
A: Yes. Dark vinyl siding panels can be restored and matched on-site using custom-blended flexible resin pigments containing UV-stabilized capstock additives. Technicians match the precise shade, sheen, and grain pattern directly on the jobsite, eliminating dark panel fading boundaries and dye lot variations.
Q: How long does an on-site vinyl siding or window frame repair take to complete?
A: Most localized vinyl repairs, including scratch removal, hole filling, and window casing restoration, take between 1 and 2 hours per area. The restored surface cures quickly, allowing same-day final walkthroughs and municipal inspections without scheduling delays.
Q: Will an on-site vinyl siding fix hold up under harsh weather and extreme temperatures?
A: When performed using professional thermo-setting vinyl resins and flexible exterior coatings, the repair bonds chemically with the surrounding PVC material. This allows the restored area to expand and contract naturally during extreme heat or freezing conditions without cracking, peeling, or chalking over time.
Q: Is restoring damaged vinyl window casings cheaper than replacing the window unit?
A: Restoring a damaged vinyl window frame or exterior casing typically costs 60% to 80% less than full window replacement. Restoration eliminates the need to break exterior moisture barriers, cut away flashing tape, or repair interior drywall trim, making it significantly faster and more cost-effective.