
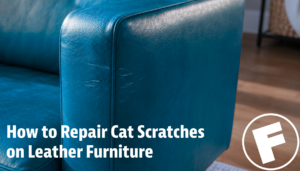
How to Repair Cat Scratches on Leather Furniture
Discovering claw marks on your beautiful living room investment is a heartbreaking moment for any homeowner. We love our feline companions, but their natural urge to stretch and mark territory can cause serious problems for premium materials. If you are staring down a trail of shredded fibers and puncture marks, take a deep breath. Knowing how to deal with cat scratches on leather couch cushions can save you thousands of dollars in replacement costs.
Leather is an incredibly resilient material. Unlike fabric, which unravels permanently once torn, leather can often be smoothed, filled, re-bound, and recolored. Whether your pet caused minor surface abrasions or deep, structural tears, this guide covers the spectrum of leather scratch repair to restore your home back to pristine condition.
Understanding Your Leather Type
Before grabbing a single bottle of oil or a repair kit, you must identify what kind of leather you have. Treating aniline leather with products meant for protected leather can cause permanent staining.
Pigmented or Protected Leather
This is the most common material used for high-traffic family furniture. It features an opaque topcoat of pigment and a clear protective sealing layer over the surface. It is highly resistant to spills and can withstand more vigorous DIY physical restoration techniques.
Aniline and Semi-Aniline Leather
Aniline leather is dyed exclusively with soluble dyes, showcasing the natural hide completely. It has no protective surface layer and is highly absorbent. Semi-aniline leather has a very thin matching tint topcoat. Both require specialized leather scratch repair formulas to avoid darkening the hide permanently.
Nubuck and Suede
These feature a brushed, velvet-like nap. Standard fillers, glues, and heavy conditioners will ruin the texture of suede or nubuck instantly. If you are dealing with cat scratches on leather furniture with a brushed nap, you will almost always require specialist tools like suede blocks or professional interventions.
Assessing the Severity of the Pet Damage
A successful repair depends entirely on matching your strategy to the depth of the claw damage. Let us break down the three primary tiers of damage so you can determine whether to attempt a home remedy or call in a professional pet damage furniture repair service.
- Minor Scratches (Surface Level): The scratch has only affected the clear top coat or the surface pigment. The leather color might look slightly lighter, but you cannot feel deep ridges, and no loose fibers are pulling away from the hide.
- Medium Scratches (Deep Scopes): The claw has cut through the pigment coating and into the actual leather fibers. You can feel a definite ridge with your fingernail, and there may be white or gray fuzzy fibers protruding from the surface.
- Severe Damage (Deep Gouges and Punctures): The cat has repeatedly used the corner of the sofa as a scratching post. The leather is completely shredded, structural integrity is lost, the underlying foam cushion might be visible, or deep holes have punctured through the entire thickness of the hide.
The Initial Step: Cleaning and Preparing the Surface
No matter the extent of the damage, you must never apply repair compounds, oils, or colorants to dirty leather. Oils from human skin, pet dander, and dust prevent fillers and glues from adhering to the leather structure.
- Vacuum the Area: Use a soft-brush attachment to gently remove loose dust, pet hair, and debris from inside the scratch channels.
- Apply a Dedicated Leather Cleaner: Dampen a lint-free microfiber cloth with a pH-balanced leather cleaner. Wipe the scratched area and the surrounding panels using gentle, circular motions.
- De-grease If Necessary: For areas where heads or hands frequently rest, use a specialized leather degreaser. This removes deep-seated body oils that would otherwise reject repair compounds.
- Allow to Dry Fully: Let the furniture air-dry naturally for at least one to two hours before proceeding to the actual restoration phase.
Step by Step Guide for Minor Scratches
If the cat scratches on leather couch surfaces are superficial, you can often blend them away by re-hydrating the surrounding hide.
Method 1: The Leather Conditioner Technique
High-quality leather contains natural oils that keep it supple. When a light scratch occurs, it often just dries out and displaces these oils, making the scratch appear bright white or light gray.
- Apply a penny-sized amount of premium leather conditioner to a soft cloth.
- Rub the conditioner over the scratch in circular motions, expanding outwards into the undamaged furniture panel.
- Allow the conditioner to soak in for 10 to 15 minutes. The leather will absorb the moisture, causing the fibers to swell slightly and naturalize the scratch color.
- Buff the area gently with a dry part of the cloth to remove any excess shine or residue.
Method 2: The Hairdryer Warming Trick
Many modern protected leathers are treated with special oils and waxes that react favorably to low, gentle heat.
- Set your household hairdryer to a medium heat setting.
- Hold it roughly six to eight inches away from the surface scratches.
- Gently warm the leather while massaging the scratch with your thumb in a circular motion.
- The heat draws the built-in oils to the surface, allowing the displaced color to shift back into the scratched valley.
- Caution: Never hold the hairdryer too close or leave it in one spot for more than a few seconds, as overheating will cause the protective top layer to blister and shrink.
Step by Step Guide for Medium Scratches
When fibers are frayed and sticking out, simple conditioning will not suffice. To successfully fix scratched leather couch panels, you need to bind the loose structure back down to achieve a smooth finish.
- Trimming the Frayed Fibers: Take a pair of sharp embroidery scissors and carefully clip away the loose, fuzzy white threads sticking up from the scratches. Do not gouge into the leather; simply trim the loose fluff flush with the surface so it does not interfere with the smooth repair path.
- Applying a Structural Leather Binder: Apply a small amount of liquid leather binder to a sponge. Dab it over the damaged area, ensuring it penetrates deep into the exposed core. The binder seeps into the raw leather components, knitting them back together as it cures. Apply 2 to 3 thin coats, allowing each layer to dry completely or speeding up the process with a cool hairdryer setting.
- Sanding the Surface Level: Once the binder is completely dry, use a sheet of ultra-fine 1200-grit sandpaper to gently smooth down any ridges. Use very light pressure. The goal is to make the damaged zone flush with the untouched surrounding leather. Wipe away the dust with a dry cloth.
- Recoloring and Sealing: Dab a matching leather colorant or pigment dye onto a clean sponge and apply it to the sanded repair area. Thin layers prevent clumping. Feather the edges outwards so the fresh color blends seamlessly with the original finish. Once the colorant dries, apply a layer of leather satin or matte sealant finish to lock in the pigment and restore the factory sheen.
Tackling Severe Structural Shredding
If your cat has completely destroyed an entire armrest or corner panel, the repair process shifts from basic maintenance to serious leather restoration for pets. For these projects, you will need a comprehensive leather repair kit containing heavy-duty flexible leather filler.
Step 1: Sub-Patch Installation (For Punctures and Rips)
If claws have created holes that go completely through the hide, you must establish a structural backing layer. Cut a piece of heavy fabric canvas or repair mesh slightly larger than the hole. Insert it through the tear using a pair of tweezers, flattening it out behind the leather skin. Apply a thin layer of leather fabric glue between the backing patch and the underside of the leather hide, pressing firmly to bond them together securely.
Step 2: Applying Flexible Leather Heavy Filler
Heavy filler acts like auto-body compound or wood putty but remains highly flexible once dry. Using a palette knife or flexible plastic spatula, apply thin layers of heavy filler directly into the claw gouges. Press it firmly into the gaps, then scrape the knife flat across the surface to remove any excess buildup. It is always better to apply two or three thin layers rather than one thick layer, which can crack during curing. Allow the filler to dry for several hours between applications.
Step 3: Sanding and Texturing
Once the final layer of filler is fully cured, sand it flat using 800-grit sandpaper followed by 1200-grit sandpaper. If your leather has a very pronounced pebbled texture, you can replicate this by pressing a piece of textured plastic or a leather grain stamp onto the semi-dry filler layer right before it cures completely.
Step 4: Custom Color Restoration
Because filler dries white or clear, custom color matching is essential for severe pet damage furniture repair. Mix your matching leather color pigment carefully. Apply it with a sponge or an airbrush system using light, feathered motions until the filler patch completely disappears into the surrounding aesthetic framework of the couch. Apply a protective topcoat to finish.
Proactive Tips to Prevent Future Cat Damage
Repairing your furniture is only half the battle; preventing your pet from returning to the exact same spot is the crucial next step. Cats scratch to stretch their muscles, shed their outer claw sheaths, and leave scent markers from the sweat glands in their paws.
- Provide Dedicated Alternatives: Place a sturdy, high-quality sisal rope scratching post right next to the corner of the couch they love to attack. Reward them with treats whenever they use the appropriate post.
- Use Anti-Scratch Deterrent Tape: Apply clear, double-sided pet training tape to the targeted corners of your leather couch. Cats hate the sticky texture on their paws and will quickly learn to avoid the area entirely.
- Apply Natural Scent Repellents: Lightly mist the base of the furniture with a pet-safe deterrent spray containing citrus, rosemary, or eucalyptus essential oils. Cats find these smells highly unpleasant, while humans find them refreshing.
- Keep Claws Trimmed: Clip your cat’s claws every two to three weeks, or consider utilizing soft plastic nail caps that glue safely over their claws to prevent them from breaking the surface of your furniture.
Knowing When to Call a Certified Professional
While minor to moderate claw damage can make for an incredibly satisfying weekend DIY project, severe structural failure often demands expert hands. If you are dealing with vintage aniline hides, rare designer finishes, or massive shredding across entire seating cushions, attempting a home fix can sometimes result in a blotchy, uneven surface texture that looks worse than the initial scratches.
National leather restoration specialists possess commercial-grade color-matching computer systems, specialized tools, and advanced chemical binders that mimic factory finishes flawlessly. They can seamlessly rebuild missing leather structures, re-dye entire sections to match aged patinas perfectly, and save you the massive expense of buying a brand-new living room set.
If your beloved leather sofa has suffered significant pet wear and tear, don’t rush to replace it just yet. Our nationwide network of mobile restoration specialists can visit your home directly to erase years of claw marks, stains, and scuffs safely and cleanly. Contact us today to receive a free, no-obligation repair estimate and discover how easy it is to bring your valuable leather furniture back to life.
Frequently Asked Questions
Q: Can all types of cat scratches on a leather couch be fixed at home?
A: No, only minor surface scratches and moderate fiber fraying are well-suited for DIY home repair projects. Severe shredding, wide tears that expose internal foam cushions, and deep puncture wounds on specialty aniline or suede leathers typically require industrial-grade compounds and professional color blending to restore properly.
Q: Will using olive oil or baby oil fix cat scratches on leather furniture?
A: You should avoid using household vegetable oils, olive oils, or mineral-based baby oils on your furniture. While they might make a scratch disappear temporarily by darkening the hide, these oils do not dry. They seep deep into the internal structure, eventually turning rancid, rotting the fibers, and preventing proper leather adhesives or colorants from binding to the area in the future.
Q: How do I match the exact color of my couch for a leather scratch repair project?
A: To get a seamless match, check the underside or base of your sofa for a manufacturer fabric sample tag, or take an inconspicuous sample (such as a small sliver from an interior seam flap) to a local paint or leather store for matching. Alternatively, premium repair kits include tinting charts with base colors like black, white, brown, and yellow so you can slowly mix and adjust the tone to perfection.
Q: Is it possible to completely hide severe pet damage from furniture repair areas?
A: Yes, with patience and the right multi-layer technique, you can make severe damage practically invisible to the casual eye. Using flexible heavy fillers combined with precise grain texturing stamps and a feathered custom-matched pigment spray allows the repaired zone to blend flawlessly into the structural appearance of the couch.