
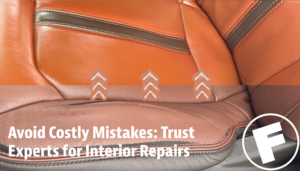
Avoid Costly Mistakes: Trust Experts for Interior Repairs
That sinking feeling hits the moment you step into your vehicle and spot it: a deep crack running across your driver seat, an unsightly scuff on the dashboard, or a cigarette burn right on the center console. Your vehicle’s cabin is where you spend hours every week. It is a space of comfort, personal style, and significant financial investment.
When interior damage occurs, the temptation to jump onto a video sharing site, buy an inexpensive fix-it kit from a local auto parts store, and handle the job yourself is strong. After all, how hard can it be to patch a small tear or spray paint a faded panel?
Unfortunately, what seems like a simple afternoon project often turns into a cosmetic nightmare. Incorrect adhesives harden into brittle eyesores, mismatched dyes turn subtle scuffs into glaring patches, and improper chemical applications melt sensitive plastic trim. The truth is that car interior repair mistakes can quickly strip thousands of dollars from your vehicle’s resale value and end up costing far more to fix than if you had sought help from the start.
In this guide, we will unpack common cabin restoration blunders, examine the care required for delicate materials, and explain why trusting trained specialists is the smartest financial move for your car.
The Hidden Costs of Self-Made Cabin Fixes
To understand why quick self-administered fixes so frequently backfire, one must first appreciate how modern vehicle cabins are built. Auto manufacturers do not simply wrap seats in standard couch material or mold dashboards from basic household plastics. Modern cabin materials are engineered to withstand extreme conditions, including intense sunlight, sudden temperature changes, continuous rubbing, and constant exposure to oils from human skin.
When you attempt a surface fix with a generic store-bought kit, you are putting one-size-fits-all products up against highly engineered material science.
Comparing Quick DIY Fixes to Professional Care
- Color Matching: Retail kits rely on standard eye-matched paints, whereas specialists use digital tools and exact factory color formulations.
- Surface Preparation: Home fixes usually involve basic household wipes, while experts perform deep chemical degreasing and surface priming.
- Structural Integrity: Store-bought kits rely on rigid superglues and surface patches, whereas trained technicians use flexible backing meshes and structural bonding compounds.
- Material Durability: DIY attempts leave brittle, temporary layers, while professional repairs apply commercial-grade topcoats and sun shields.
A quick store-bought fix might look acceptable under garage lighting for a single day. However, after a few sunny afternoons or cold winter mornings, low-grade resins shrink, peel, crack, and turn yellow. What began as a minor scratch suddenly morphs into a larger structural failure that requires extensive component replacement.
Common Interior Repair Blunders You Must Avoid
1. Using Generic Cleaners and Harsh Solvents
One of the most widespread errors happens before any repair compound is even applied: improper surface preparation. Many vehicle owners assume that stronger cleaning products always yield better results. They grab rubbing alcohol, household bleach, acetone, or heavy-duty soaps to strip grease from damaged surfaces.
This approach creates immediate chemical damage. Natural hides rely on delicate essential oils and protective factory topcoats. Harsh solvents strip away these lubricants, leaving the material dry, stiff, and prone to severe cracking. Similarly, strong chemicals break down the plasticizers that keep synthetic materials flexible. Once those flex agents evaporate, panels become chalky and brittle.
Specialists use pH-neutral, surface-specific cleaners designed to remove grime without stripping essential moisture or destroying original topcoats.
2. Eyeballing Color Matches
Matching auto interior trim colors is far more complicated than picking a basic shade from a paint swatch. Car manufacturers utilize thousands of distinct color formulations, often featuring subtle undertones of blue, yellow, red, or gray. Furthermore, ambient sunlight, age, and everyday use alter your vehicle’s original shade over time.
Attempting to match a faded beige or dark charcoal seat with a standard tube of colored liquid almost always results in a blotchy patch. Under direct sunlight, color discrepancies stand out immediately, drawing the eye right to the botched repair.
Achieving invisible blending requires custom-mixed dyes. Skilled technicians understand how dyes dry, shift in tone as they cure, and react with different grain patterns. This level of precision is why turning to expert interior restoration is the safest way to ensure your cabin looks factory-fresh.
3. Relying on Rigid Glues on Flexible Seats
When faced with a tear in seating upholstery or a split seam on a side bolster, many well-meaning vehicle owners reach for household superglues or heavy-duty epoxies. While these adhesives create immediate strong bonds, they are completely unsuited for vehicle seating and flexible trim.
Vehicle upholstery flexes, stretches, and compresses every time a driver enters, sits, or adjusts position. Superglues dry into hard, glass-like crystals. When you sit on a seat patched with rigid adhesive:
- The surrounding flexible material stretches under your body weight.
- The rigid adhesive refuses to yield.
- The soft material tears away around the hardened glue plug, creating a hole significantly larger than the original tear.
Experienced upholstery repair specialists utilize flexible, polyurethane-based bonding compounds and backing mats that stretch and compress naturally alongside the surrounding upholstery.
4. Overlooking Structural Cushion Damage
A tear or crack on your seat is rarely just a surface issue. Underneath that outer layer lies contoured foam that provides physical support and maintains the shape of the seat bolster.
When covers rip, the internal foam becomes exposed to moisture, friction, and air. Over time, the foam breaks down, turns into dust, and loses its shape. Simply placing a patch over a sunken or crumbling foam core creates an unsightly hollow spot that sags, wrinkles, and fails within weeks.
Quality restoration involves repairing or rebuilding the underlying cushion structure first, restoring the original bolster contours before sealing the outer hide or synthetic surface.
5. Applying Too Much Heat
Many retail repair kits include small heating tools or advise using household irons to set repair compounds and grain patterns. Controlling temperature with consumer equipment is notoriously difficult.
If you apply too little heat, the repair compound fails to bond chemically, remaining sticky and weak. If you apply too much heat, the surrounding original material burns, shrinks, or melts, turning a small scratch into a damaged area requiring total panel replacement.
Professional technicians employ precise, temperature-controlled heat tools paired with quick-chilling grain pads to set repair resins safely without scorching surrounding surfaces.
6. Skipping Protective Sun Topcoats
Applying color dye is not the final step of a proper repair. The final step, which is frequently skipped in amateur fixes, is applying a clear protective topcoat.
Automotive interiors experience constant environmental stress. Unprotected dye layers quickly fade, transfer onto clothing, or rub off from routine friction. A proper protective topcoat serves as a durable shield that seals color, regulates shine levels to match matte or satin finishes, and guards against sun exposure.
7. Replacing Components When They Can Be Fixed
On the opposite end of the spectrum, some vehicle owners assume that any noticeable cabin damage requires buying brand-new factory replacement parts or paying for expensive total re-upholstery. Replacing an entire seat cover or dashboard assembly can easily cost thousands of dollars in parts and labor.
Choosing total replacement over targeted fixes is often an unnecessary financial drain. Through modern techniques in leather and vinyl repair, damaged panels, cracked dashboards, melted plastics, and stained seating can be restored to like-new condition at a fraction of the replacement cost.
How Professionals Restore Cabin Materials
Restoring vehicle cabin surfaces is a precise craft that combines practical chemistry, color theory, and hands-on skill. Whether dealing with high-end natural leather, durable commercial synthetic covers, or textured dashboard plastics, trained technicians follow structured steps to ensure seamless results:
- Step 1: Deep Cleaning and Decontamination — Eliminates oils, dirt, and silicone dressings without harming topcoats.
- Step 2: Structural Stabilization — Inserts sub-mesh backing to support weak or torn material.
- Step 3: Resin Filling and Grain Matching — Fills surface voids and replicates OEM texture patterns.
- Step 4: Custom Color Application — Blends layered dyes to match surrounding surfaces exactly.
- Step 5: Topcoat Protection — Locks in color with UV-blocking clear finishes.
Material-Specific Approaches
A modern car interior contains a wide variety of synthetic and natural surfaces. Each material requires its own unique repair process:
- Top-Grain Leathers: Require breathable, water-based colorants and rich conditioner treatments that restore soft feel without clogging pores.
- Vinyl and Polyurethane Coatings: Require high-flex resins capable of handling heat and high friction without peeling off.
- Molded Dashboard Plastics: Require strong yet flexible filling compounds that match original manufacturer grain textures.
- Headliners and Carpet: Require delicate fiber-bonding techniques to eliminate burn marks, tears, and discoloration without leaving hard spots.
Relying on specialized vehicle repair services ensures that the correct chemical formulas and application techniques are matched directly to your car’s specific materials.
Protecting Your Vehicle’s Resale Value
When selling or trading in a vehicle, first impressions carry enormous weight. While mechanical health under the hood is vital, buyers make immediate emotional judgments the moment they open the driver door.
An interior marred by cracked seating, sticky plastic trim, or clumsy home patches creates an immediate perception of neglect. Prospective buyers often assume that if the cabin was not cared for, routine mechanical maintenance was likely skipped as well.
Dealership Trade-In Appraisals
Automotive appraisers routinely deduct significant sums for cabin flaws:
- Minor Surface Tears and Scuffs: Can reduce trade-in valuations by $500 to $1,200.
- Damaged Dashboard Assemblies or Steering Wheels: Can result in appraisal markdowns exceeding $2,000 due to estimated full-component replacement costs.
Investing in professional auto upholstery repair prior to listing a car for sale or turning in a leased vehicle yields a strong return. Fixing minor flaws restores showroom appeal, gives you better negotiating leverage, and helps avoid end-of-lease wear penalties.
Environmental Benefits of Restoring Over Replacing
Beyond saving money and maintaining resale value, choosing repair over complete replacement offers a clear environmental advantage. Automotive seat covers, foam padding, and molded plastic dash assemblies contribute directly to landfill waste when thrown away.
Manufacturing new automotive components consumes significant amounts of raw materials, energy, and water, while generating industrial emissions. Choosing to repair existing materials extends the lifespan of your cabin components, reduces waste, and keeps usable parts out of local landfills.
The Smart Choice for Your Vehicle
Your car is one of your most valuable daily assets. Attempting to repair torn seats, burnt door panels, or scratched plastics with cheap DIY kits often leads to expanded damage, wasted money, and endless frustration.
By partnering with experienced interior restoration professionals, you get access to:
- Commercial-Grade Materials: High-durability finishes designed to withstand daily wear.
- Precise Color Matching: Seamless repairs that blend perfectly with existing upholstery.
- Master Craftsmanship: Reliable techniques that preserve your vehicle’s original factory quality.
Whether you drive an everyday commuter, a timeless classic, or a high-end luxury vehicle, expert restoration breathes new life into worn cabin surfaces.
Don’t let minor interior wear diminish your driving experience or erode your car’s resale value. Save time, eliminate hassle, and give your vehicle the premium care it deserves.
Ready to restore your cabin to pristine condition? Contact us today to request your free estimate or schedule your service!
Frequently Asked Questions
Q: Can repaired leather and vinyl hold up as well as original factory materials?
A: Yes. When performed by experienced technicians using flexible resins, strong bonding compounds, and protective topcoats, professional repairs match the strength, durability, and flex of original factory surfaces.
Q: How long does a typical professional interior repair take?
A: Most minor to moderate cabin repairs, including small tears, cracks, or scuffs, can be completed in two to four hours. Mobile technicians can often complete these services right in your driveway or workplace parking lot.
Q: Is it possible to match original interior textures during a repair?
A: Absolutely. Technicians use specialized grain pads and texturing tools to copy the specific surface pattern of your dashboard, door panel, or seat, making the repaired area blend into surrounding surfaces.
Q: How much can I save by choosing restoration instead of replacing entire parts?
A: Choosing targeted repairs typically saves vehicle owners between 60% and 80% compared to the cost of ordering new original parts and paying for complete re-upholstery or panel installation labor.